Selfies
Airspeed Oxford HM724 and
Bristol Blenheim Z7356 on Braeriach.
(Distance covered = 15.5 mile/Ascent
=+1715m)
I first attempted to reach the two wrecks on Braeriach while Heather was Dancing in a competition in Inverness, I found out then that I would need a lot longer day. The perfect opportunity arose when the girls went off to the 2013 Scotdance Canadian Highland Dancing Championships in Ontario.
The girls were flying out to Canada from Gatwick Airport so I dropped them off at a Hotel near the Airport at about 10pm the evening before their flight then drove through the night arriving at Aviemore the following morning at around 10am. I had planned on heading straight up the hills when I arrived but there was very high winds on the tops and I was just a little weary from a bit of an epic drive; which included two hours stuck in a traffic jam on the M5. Instead I spent my first day doing recces for three of the walks I was planning in the area: Braeriach, Ben Mcdui and Bynack Mor. I then had a very early night so I could have a very early start next day.
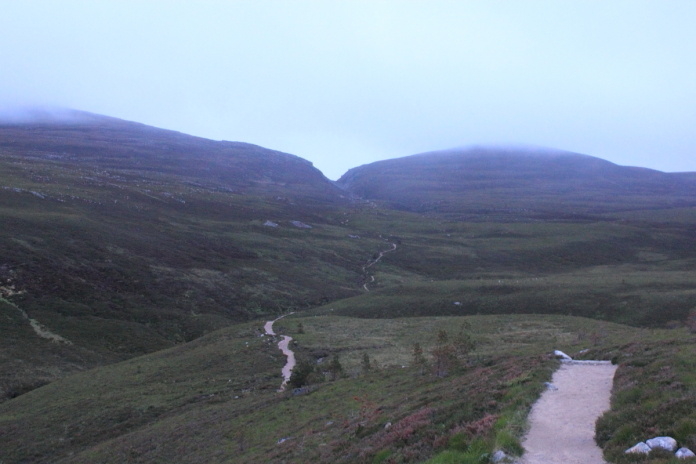
The path from the Sugarbowl carpark to the Chalamein Gap at 6am
The first obstacle the following day; not counting getting up at 5.30am, was The Chalamein Gap, this is a boulder filled nick in the hillside which is best described as 'ankle breaking good fun'. It is definitely easier going through here during daylight and when the boulders are dry, something that would be on my mind later in the day!
The Chalamein Gap
There is a well constructed path from the Sugar Bowl carpark where I'd parked the car up to the Chalamein Gap, however it does not make it through the Gap and is replaced by an eroded muddy and boulder strewn path on the other side. This path drops at first gradually, but then quite steeply down into the bowels of the Lairig Ghru where it joins a path which has followed the burn up from Rothiemurcus.
The path from the Chalamein Gap down into the Lairig Ghru
The first thing I encountered in the Lairig Ghru was a memorial to someone who had died there and just past that was a cave which the burn came out of after flowing underground for about half a mile.
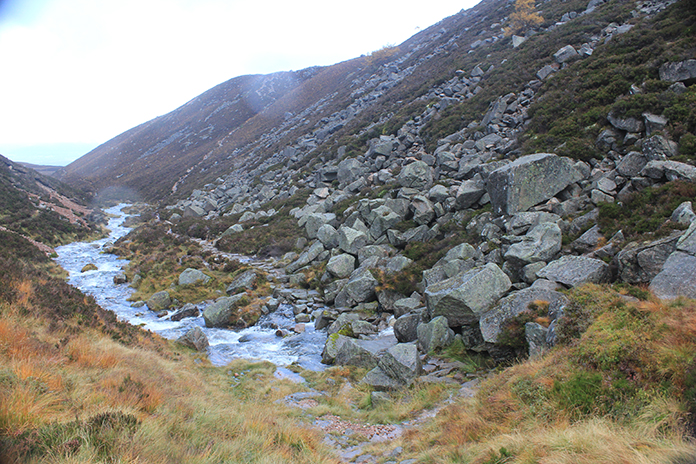
The Burn from nowhere, it goes underground
about half a mile further up and re-emerges here.
There is an even steeper path up the other side of the Lairig Ghru onto Sron Na Lairige, this path was undergoing some improvements and the workmen had left their tools beside the path , presumably to save humping them up and down the hill and also presumably safe in the knowledge no-one else would pinch them for the same reason. I was tempted however by the idea of borrowing a tracked wheelbarrow with an outboard motor, to ride up the hill.
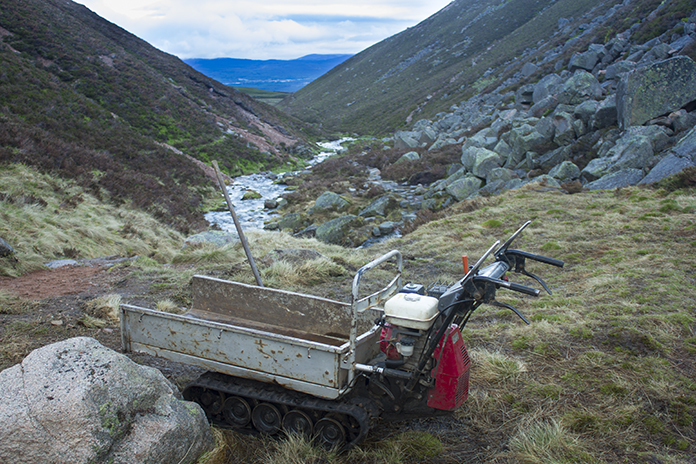
A nifty tracked wheelbarrow
powered by a petrol engine.
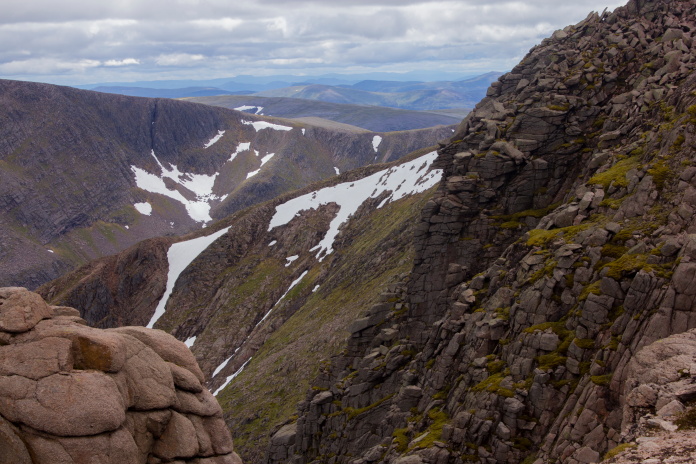
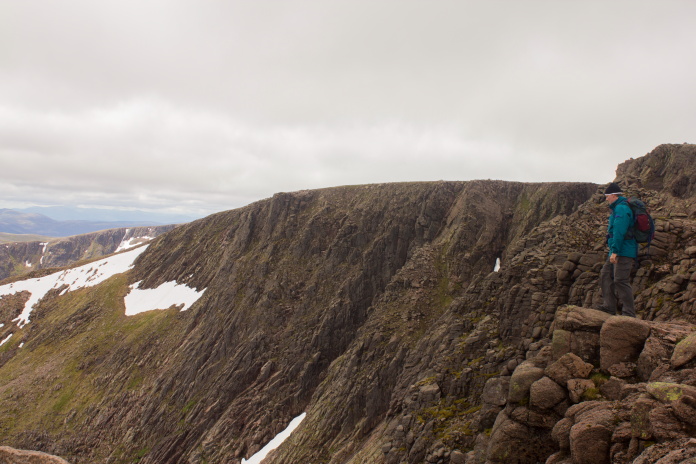
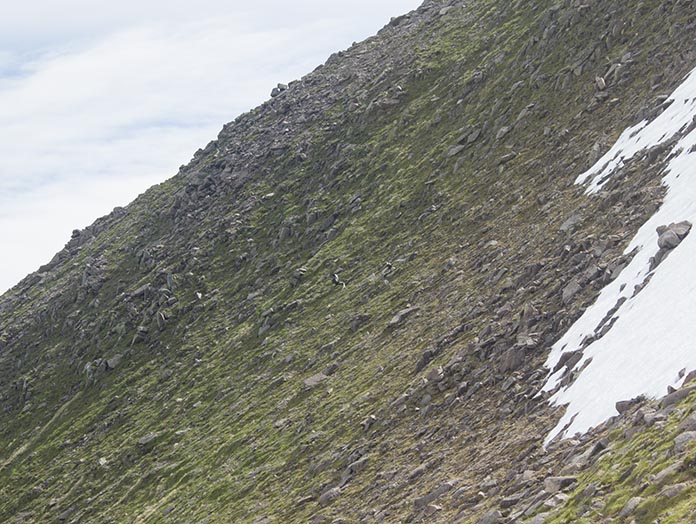
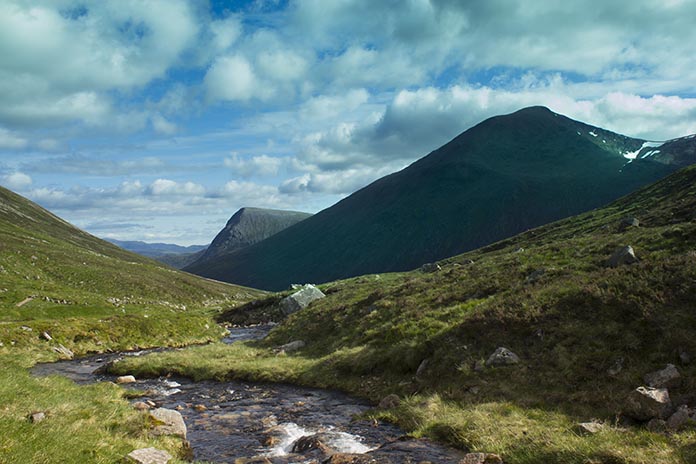
The climb onto Sron Na Lairige from the Lairig Ghru certainly got my blood pumping, I stopped at a small crag to have some refreshments and admire the clouds which were going vertically up the cliff faces opposite then swirling round in a vortex as they came off the tops. This spectacle was accompanied by a soundtrack of Stags bellowing somewhere off in the distance. The top of Sron Na Lairige was quite broad and featureless and still hidden in the cloud. Walking over the top of Sron Na Lairige I would be alright if I drifted a little off course to the right, but off to the left I would soon be in trouble so I took a precautionary compass bearing before heading off for the bealach between Sron Na Lairige and Braeriach where the two crashes had occured.
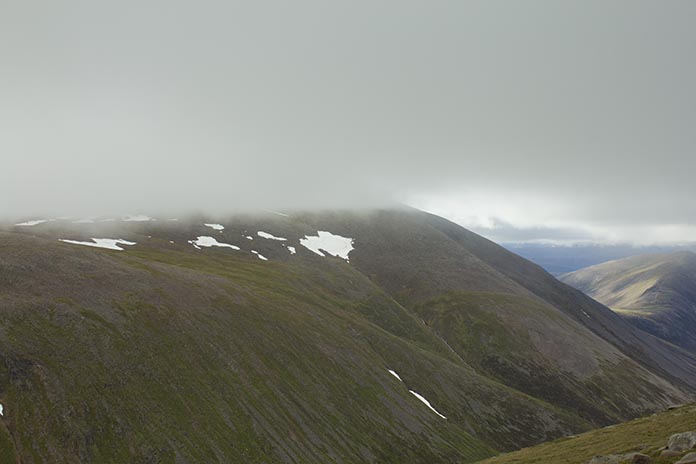
View across to Ben Mcdui from Sron Na Lairige
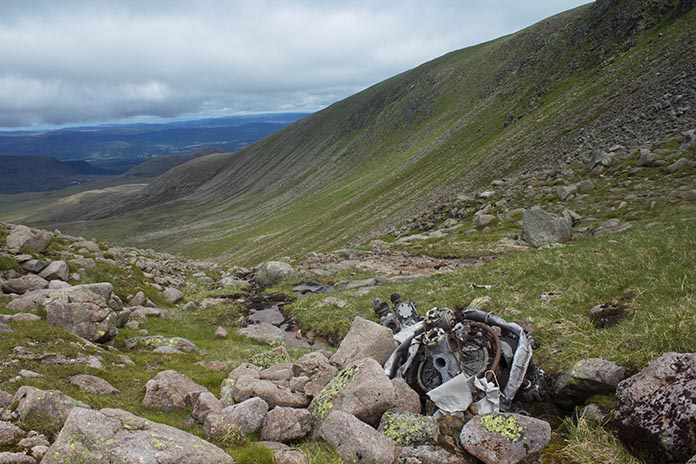
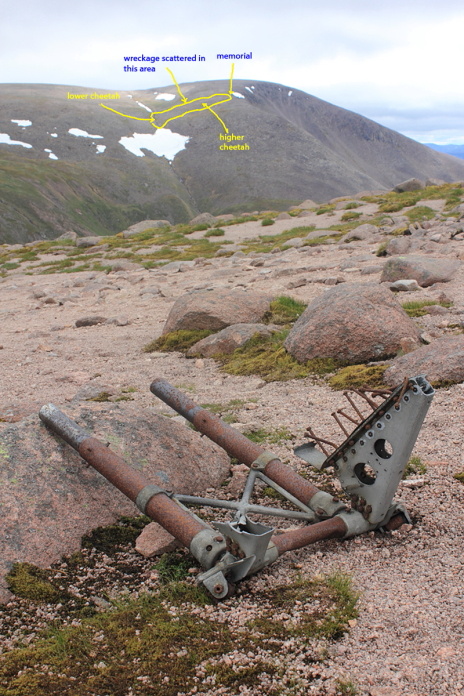
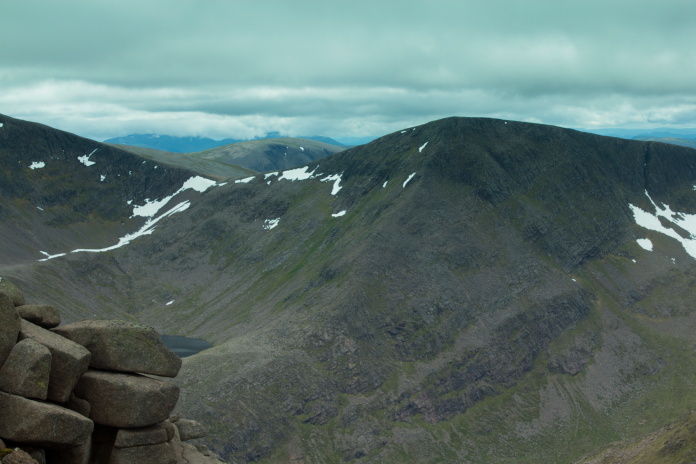
As I made my way around the top of Sron Na Lairig the cloud began to lift revealing some fantastic views all around including Ben Mcdui across the other side of the Lairig Ghru. As the two aircraft had crashed right next to each other on the bealach I'd imagined there would be pieces of wreckage scattered everywhere, but as I descended into the Bealach there was nothing immediately visible.

The bealach between Sron Na Lairige and Braeriach where the two aircraft came to grief
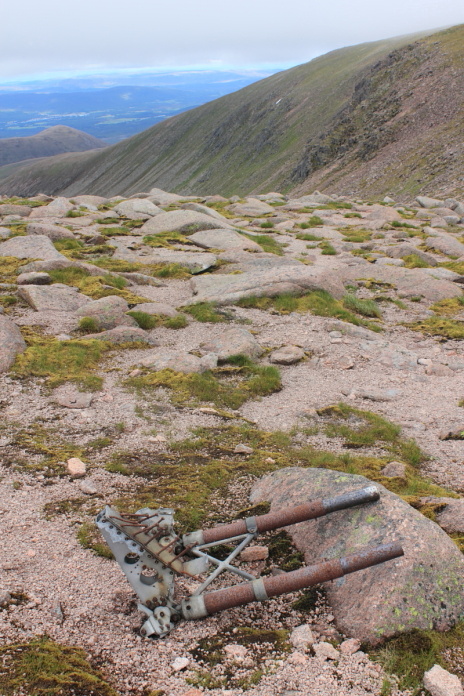
Once down into the bealach I turned off to the right to descend into Coire Beanaidh and started finding small pieces of the Oxford, further down were the two Cheetah engines. Because they are well away from the tourist path and spend most of their time hidden in snow these engines are the most intact I have seen; one is still enclosed in its engine cowling. There are quite a few bits of the Oxford scattered in the rocks down into the Coire
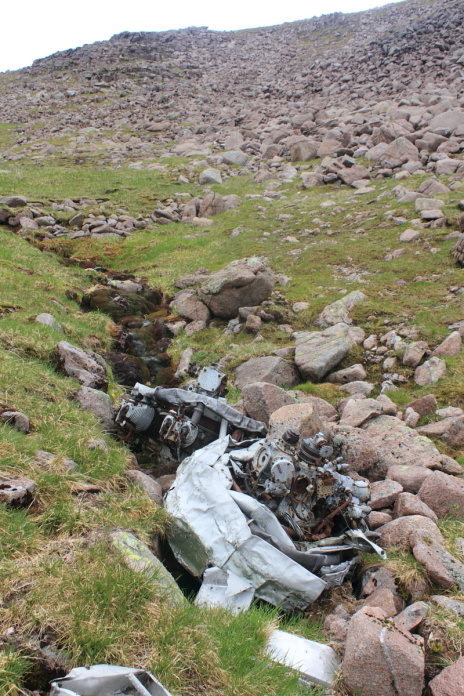
The two Armstrong Siddely Cheetah Engines from the Oxford
The two engines, lots of smaller parts are scattered down Coire Beanaidh
seen in the background for quite a distance.
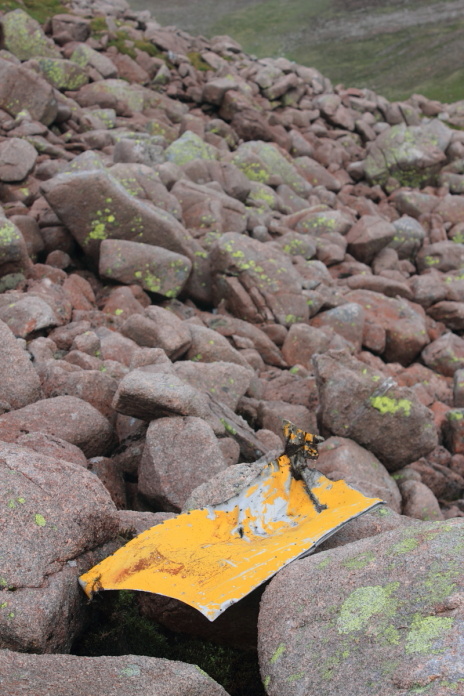
Some of the small pieces scattered down the Coire
After finding what I hoped was the last piece of the Oxford over half a mile down into Coire Beanaidh I then had to turn around and climb all the way back up onto the Bealach again, heading uphill however I did keep spotting more pieces that I had missed on the way down so that preoccupied me and I was soon back to where I started. 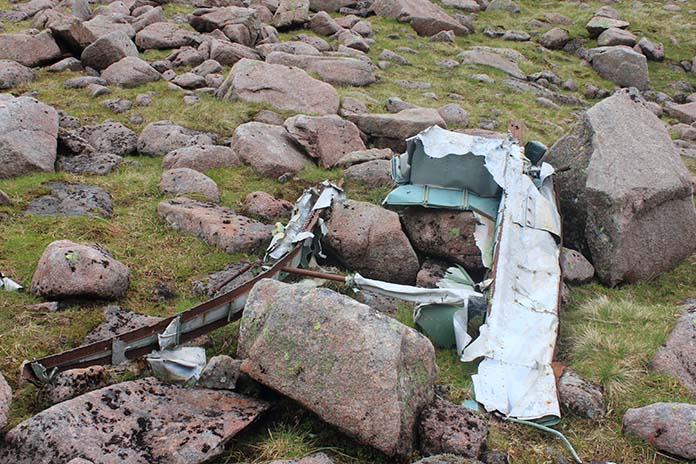
This large section of wing
was a bit of an anomaly, located quite a way down into Coire Beanaidh
amongst the pieces of Oxford wreckage it has been identified by an
Aviation Archaeology expert who found part numbers on it, as being a piece
of the Blenheim.
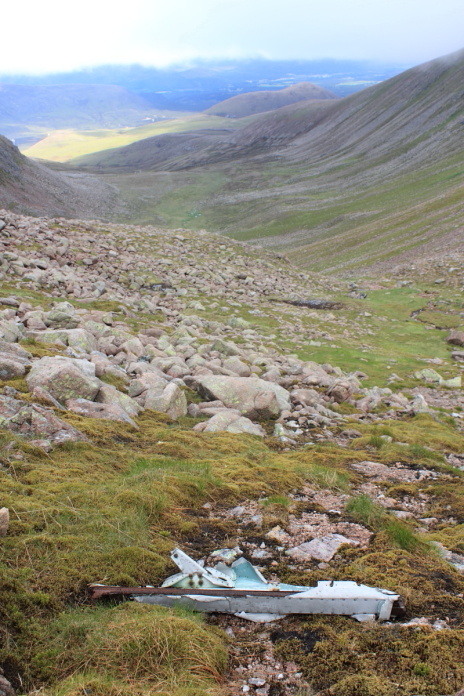
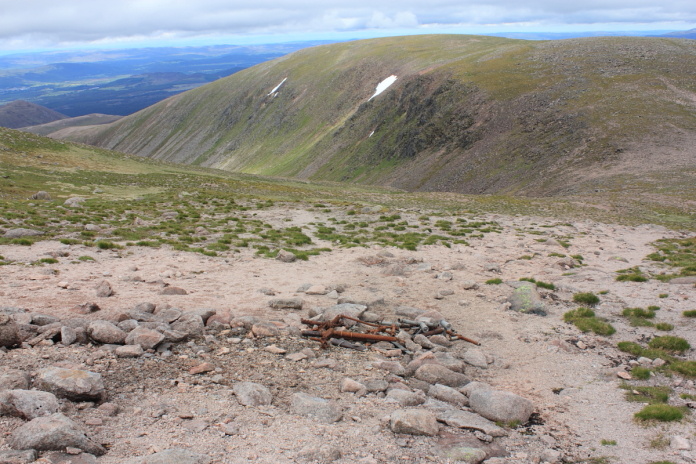
Pieces of Oxford near the
path to Braeriach. The crashsite of an Avro Anson is marked on Ben
Mcdui over the
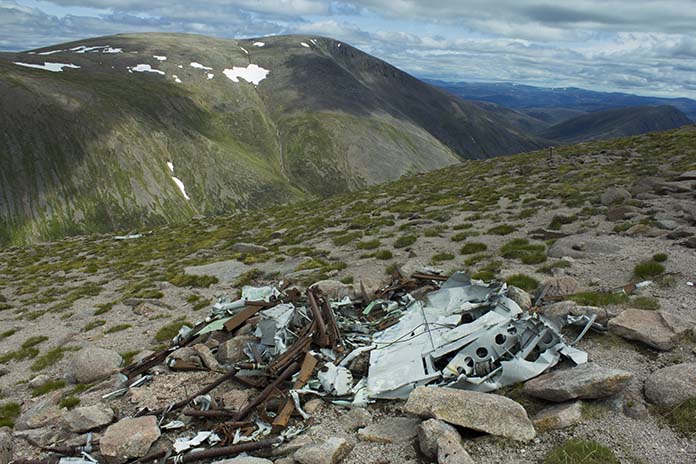
Further up, right in the middle of the path to the summit of Braeriach there is an area of debris where the recovery crew burnt the bulk of the airframe
.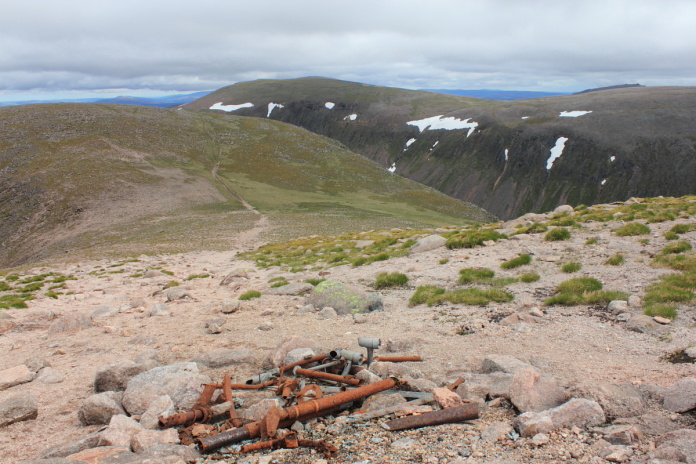 This area where the recovery crew burnt the remains of the Oxford is right in the centre of the path to Braeriach
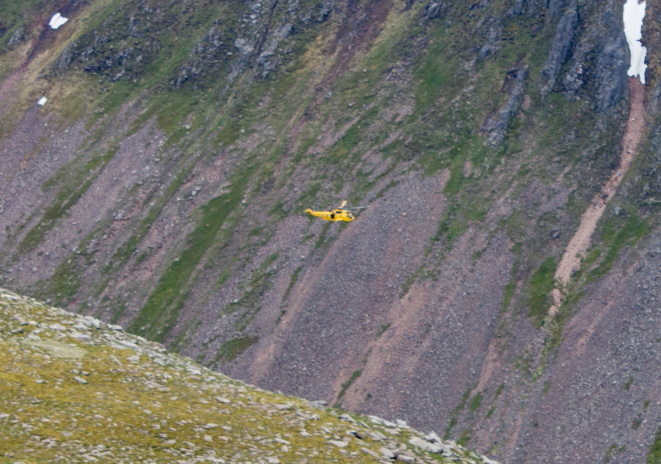
While taking photos at the area where the Oxford was burnt I heard the noise of an approaching aircraft and was treat to the spectacle of a Sea king flying up the Lairig Ghru quite some distance below the altitude I was at. Unlike the encounter I had on the top of Criffel when not one but two Lancasters flew up the Solway firth and passed below me;on this occasion I had my camera.
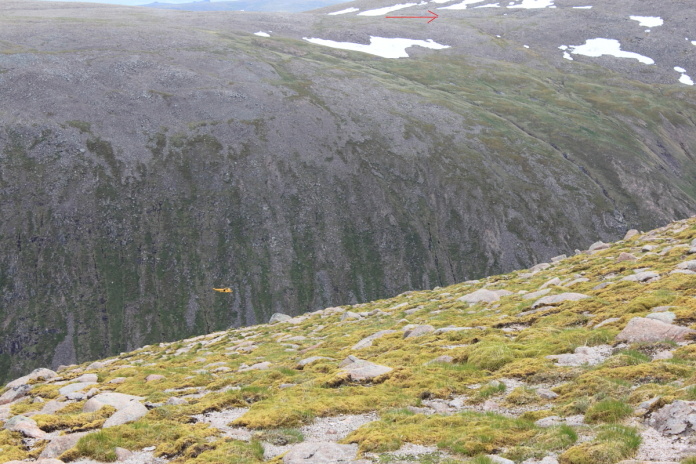
A Sea King SAR Helicopter on its way up the Lairig Ghru, the red arrow is pointing to the location of the Anson wreck on Ben Mcdui
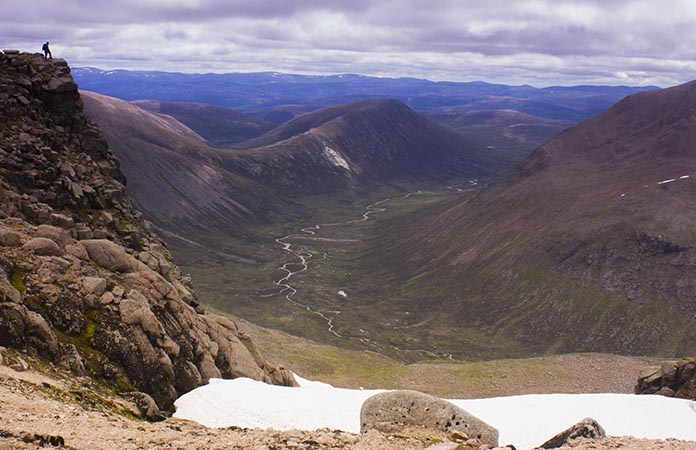
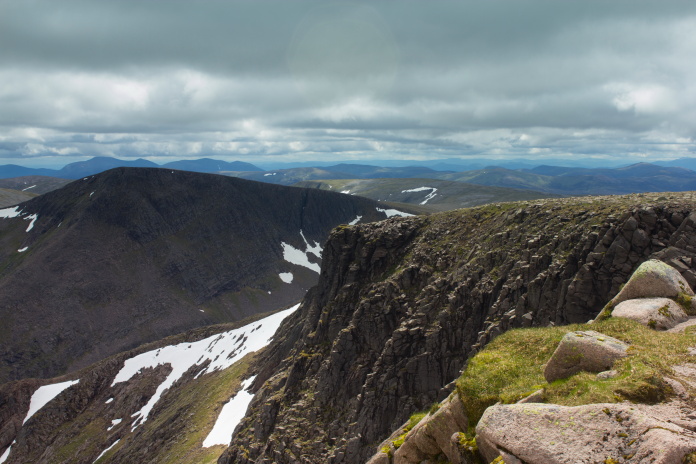
Before investigating the Blenheim wreckage I decided to visit the summit of Braeriach saying as it's the 3rd Highest mountain in the UK behind Ben Mcdui, which I was climbing the following day and Ben Nevis which I'd been to the top of twice.

Braeriach summit.
My version of a selfie, I set the self timer and ran, taking care to stop in time
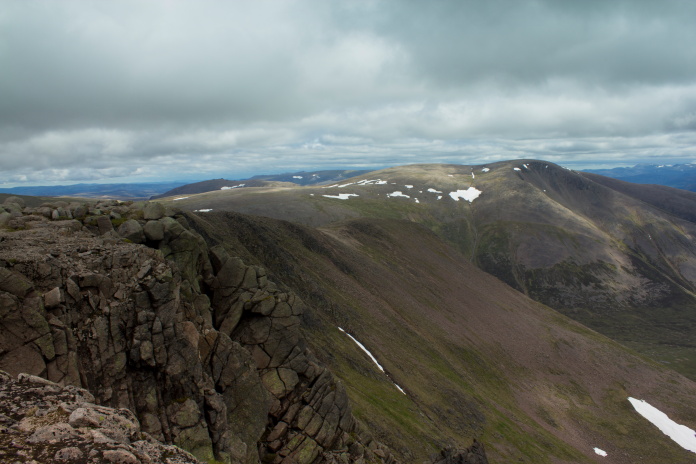
Above and next 6 photos:-Some views around the top of Braeriach and another selfie.
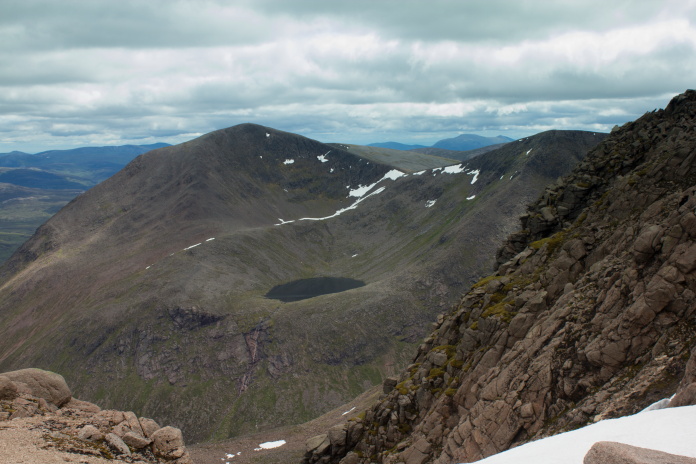
I sat in the sun for quite a while on the summit, admiring the view and enjoying my sandwiches. I could see from here that there was a large snowfield on Ben Mcdui just about where the Anson wreckage was, so I would have to decide if it would be worth chancing the long walk up there tomorrow only to find the wreckage was covered in snow.
Above and below:-large piece of wing from the Blenheim, there were several collections of wreckage like this one.
The large snowfield on Ben Mcdui is evident in the background
above, the following day I took the chance that it wasn't covering the Anson wreck that is over there.
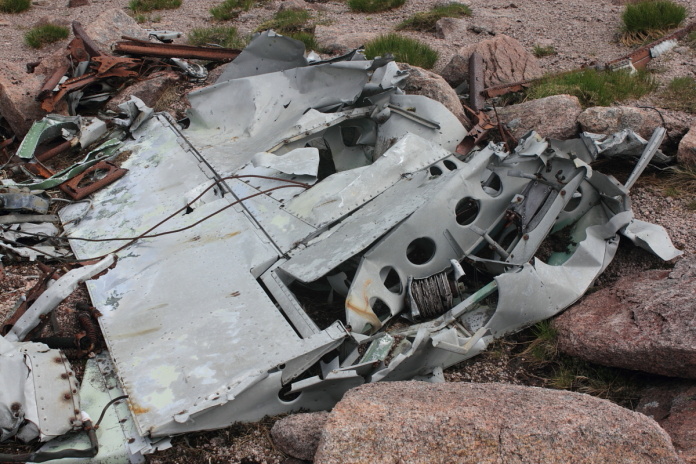
While the wreckage of the Oxford
is on the path or to the west of it down into Coire Beanaidh, the Blenheim wreckage is scattered about
the bealach about 200yrds
to the east of the path and down
Coire Ruadh into the Lairig Ghru,
apart from one large lump of
wing section which has curiously
ended up amongst the Oxford parts
way down in Coire Beanaidh.
The intial descent into Coire Ruadh is very steep but there is a path called
'The Duke's Path' which zigzags down the steep section but becomes indistinct further down, I couldn't use it on this day as there was a very long, very deep and very slippy snowbank on the steepest part.
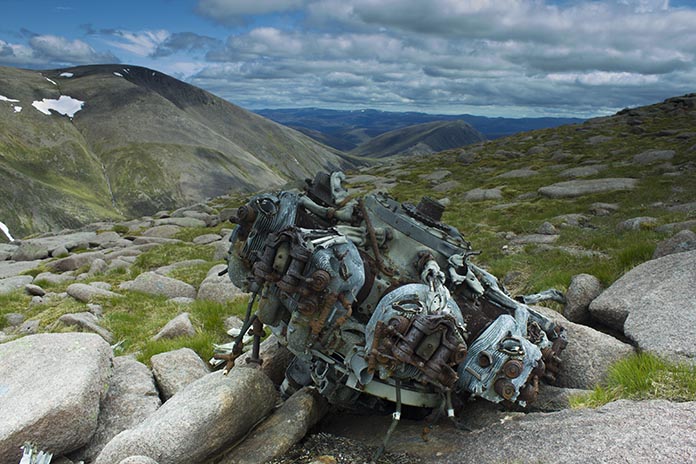
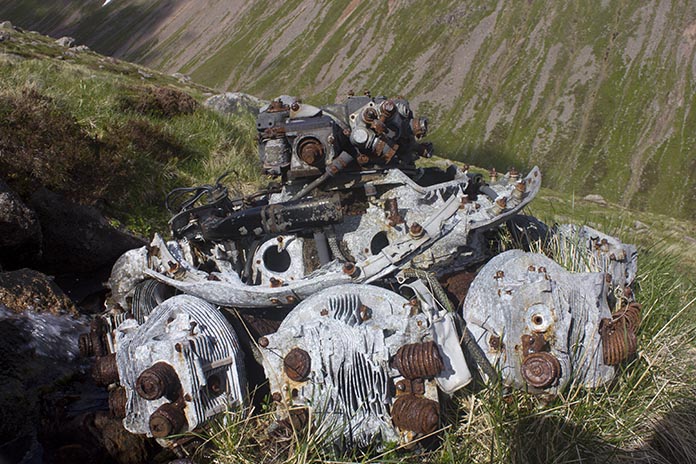
One of the Blenheim's Mercury engines, the 2nd one is quite a distance downhill
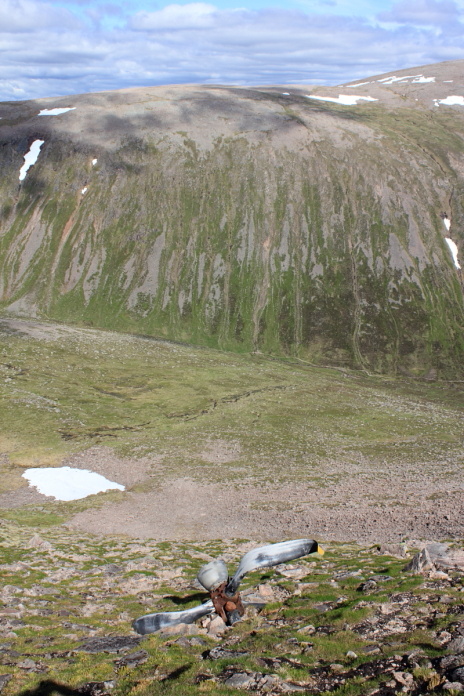
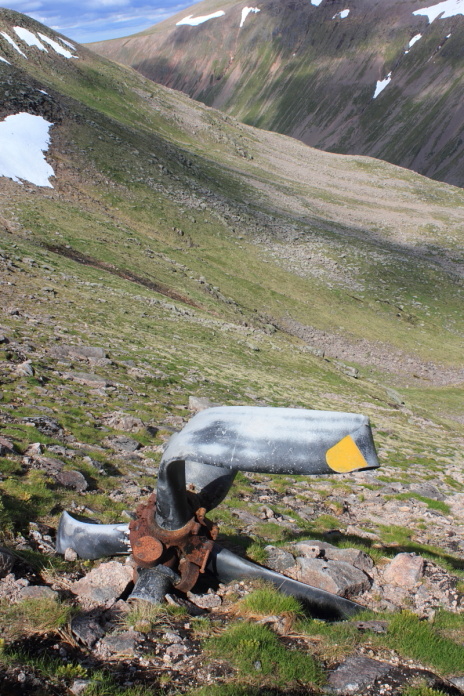
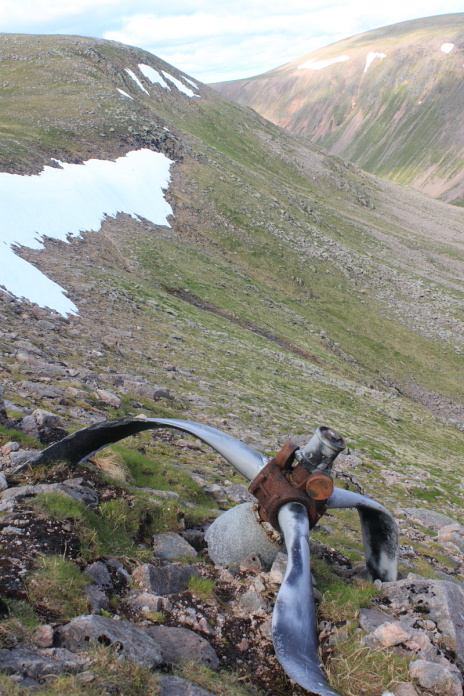
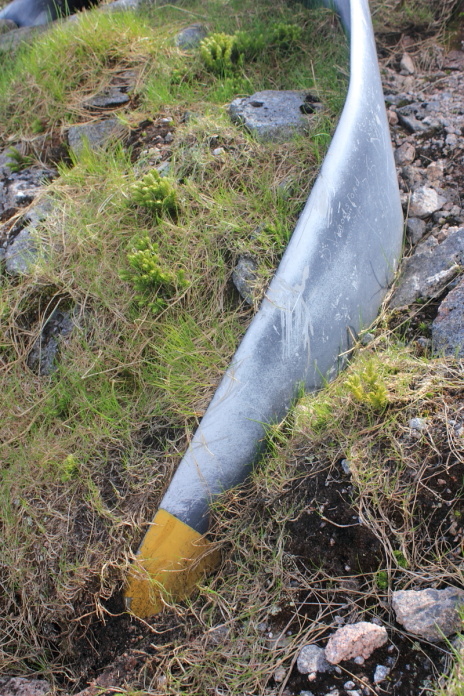
To get around the snowfield I had to make a diversion to the south onto a very steep area, because of this however I came across the two propellers from the Blenheim lying quite close to each other just below the southern end of the troublesome snow, if I'd been able to use the Duke's path I probably would have missed them.
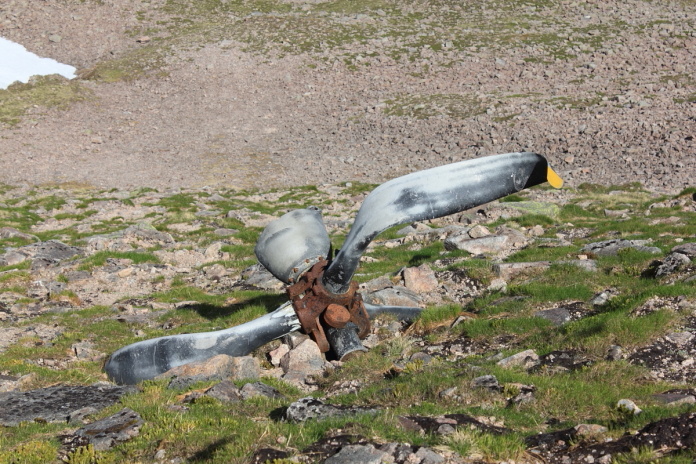
Above and next 5 photos:- Both of the Blenheims propeller units. Wonder how these ended up lying next to each other on a very steep area of ground whereas the engines they were attached to are quite a distance away and quite a distance apart?

After photographing the props I made my way back along to the other end of the snowbank to rejoin the Dukes path and the trail of wreckage below the snow. As the ground was so steep here it was pretty unnerving to stand upright so I spent a lot of time shuffling along on my backside.
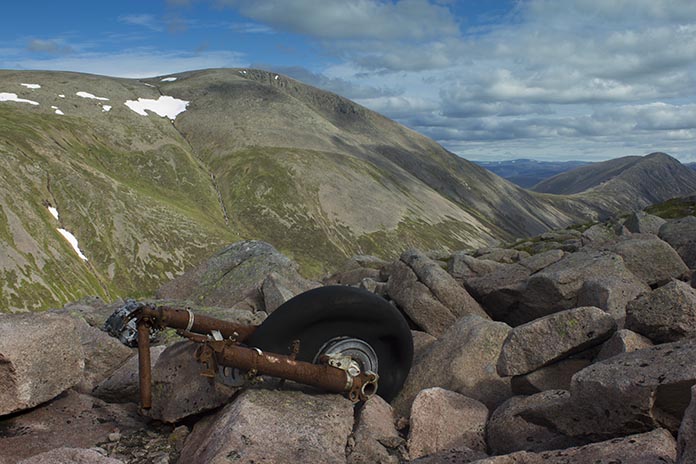
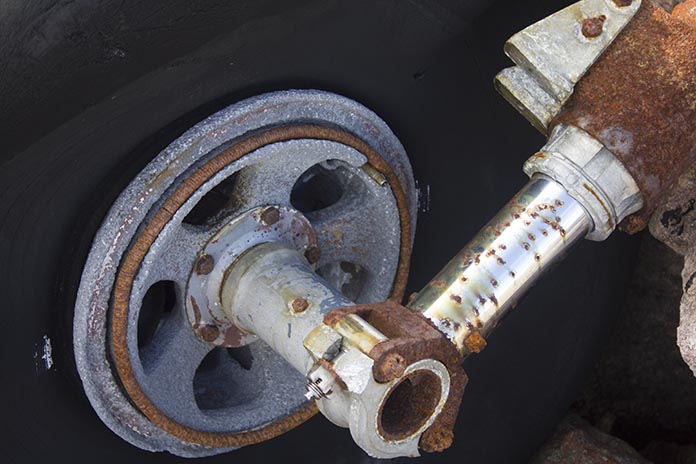
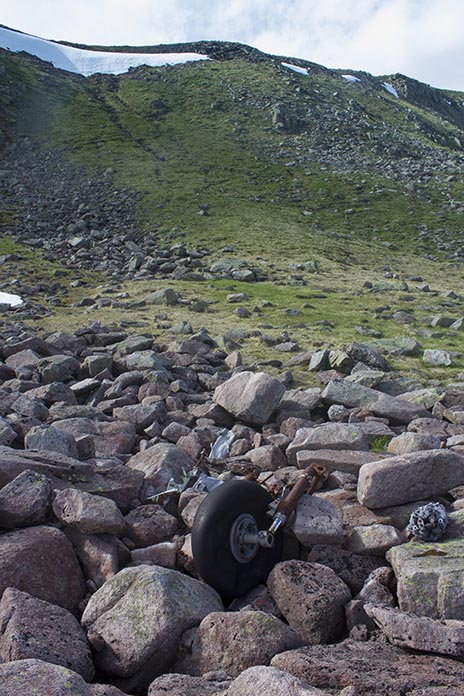
Above and
below:-One of the undercarriage legs complete with tyre.
Above and below:-Two views of the second engine,
the snow bank that caused me the problems can be seen at the top of the
slope below, the other engine is about 100 yards above that.
Taken from the Dukes Path end of the snowbank this photo shows how steep the ground is where the props are located, they can just be made
out near the centre of the photo.
Hopefully the steepness of the slope will deter thieving morons from
hacksawing the blades off and stealing them.
These
boulder fields were littered with pieces of the Blenheim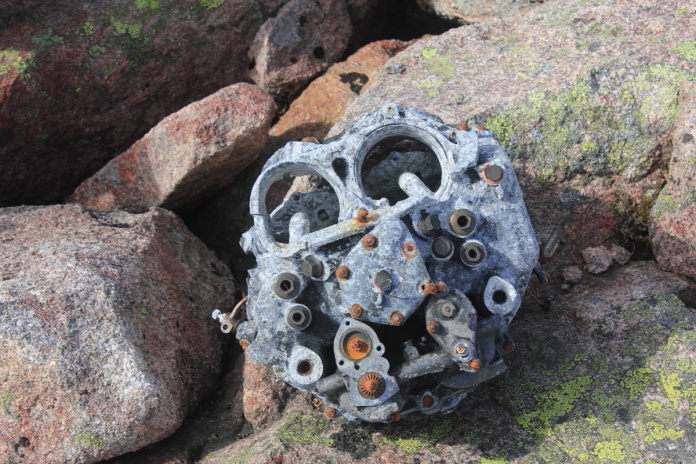
The remains of a carburetor.
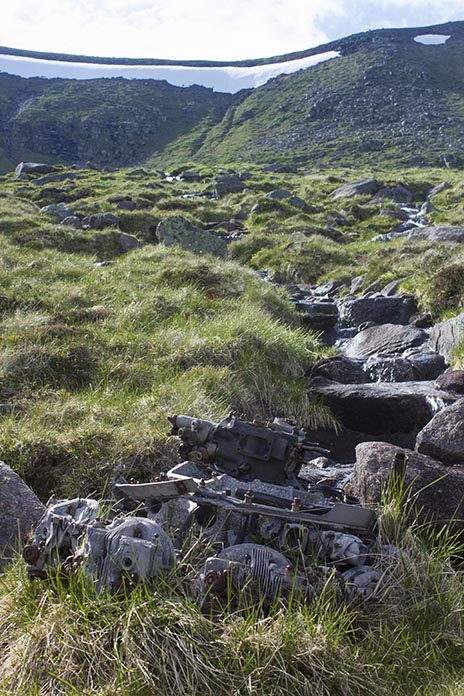
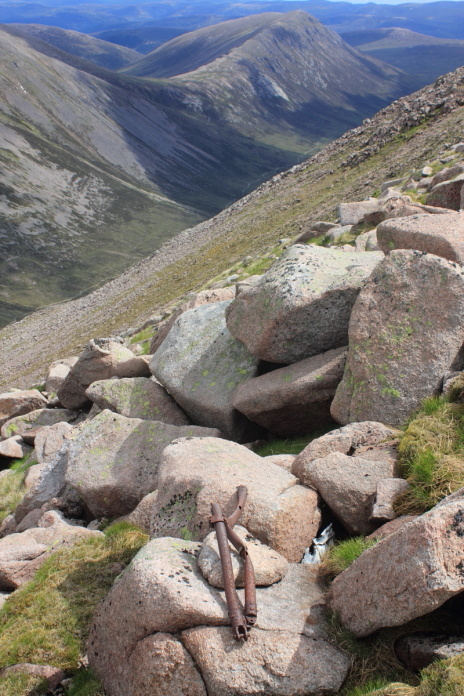
Parts from the Blenheim are scattered all the way down Coire Ruadh almost to the burn in the Lairig Ghru, the lowest piece being a bit of spar and the tailwheel which I managed to miss. That means however that I have an excuse to go back here again and if I do return I might possibly visit the summit of Cairn Toul while I'm there. Carn Toul is the 4th highest Mountain in the UK and by the end of this week I would have already been to the summit of the top three.
A Piece near to the bottom of the Lairig Ghru.
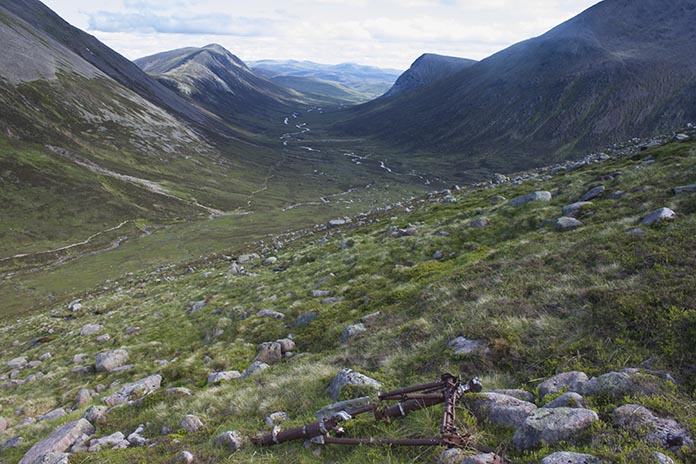
Cairn Toul from the burn in the Lairig Ghru, the hill in the distance beyond Cairn Toul is the Devil's Point, this hill's Gaelic Name actually translates as 'The penis of the Demon' but it was changed to Devil's Point when Queen Victoria asked what it was called, to save her any embarrassment.
Once down into the Lairig Ghru there was a long slog back up past the Pools of Dee over the watershed and back down to where the path coming down from the Chalamein Gap joins
from the right.
I started to think about how much fun it was going to be negotiating the Chalamein Gap if I didn't get to it before dark
but luckily I was well past it before the light started to fail and as an
added bonus the boulders were still dry.
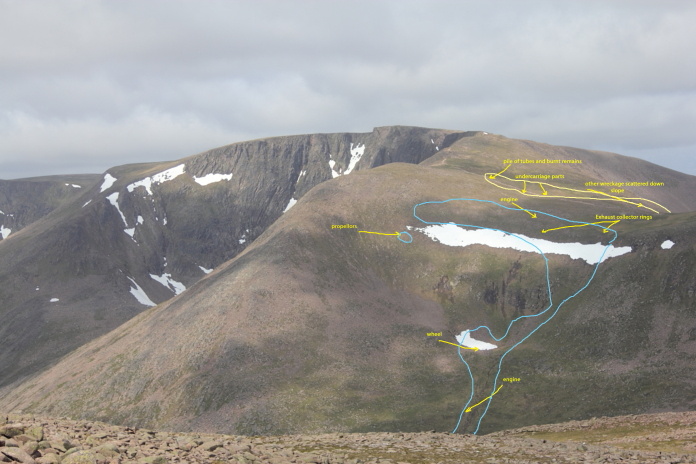
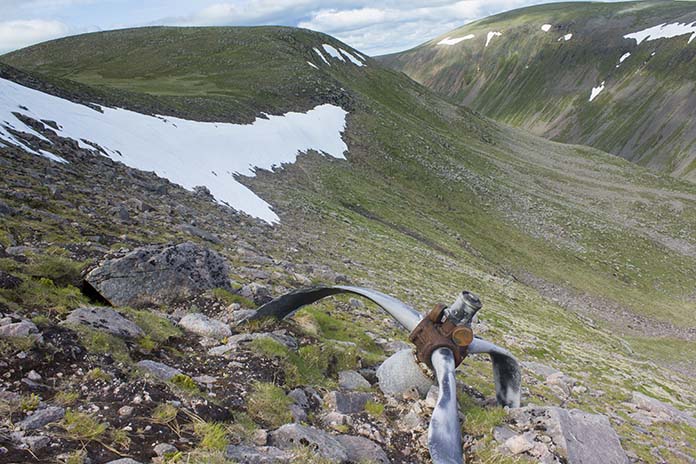
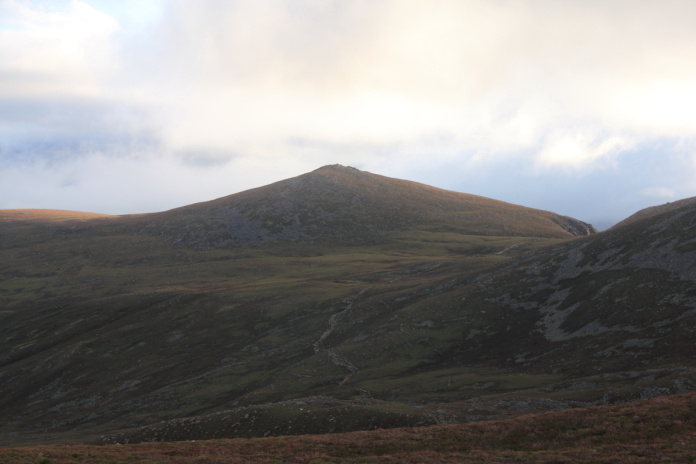
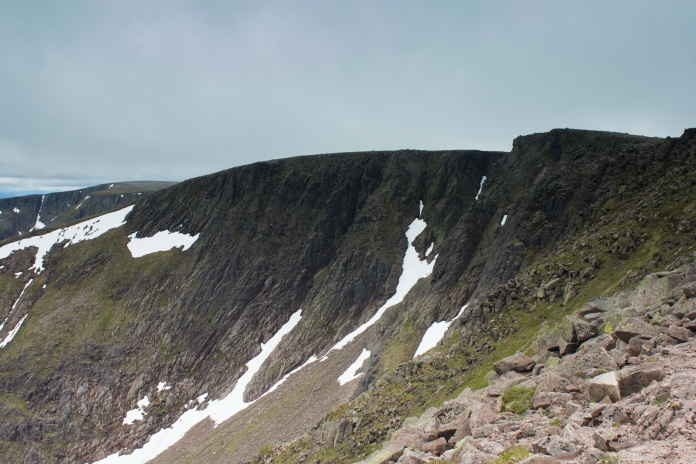
Braeriach taken from the approach to Ben Mcdui, the area of the Oxford wreckage is outlined in yellow and the Blenheim in blue.
Oxford wreckage is also scattered down Coire Beanaidh which is out of view
down the other side of the baelach on the right. Clearly visible is the large snowbank that blocked my way down The Dukes Path
.